Connect and Enable the Camera Module
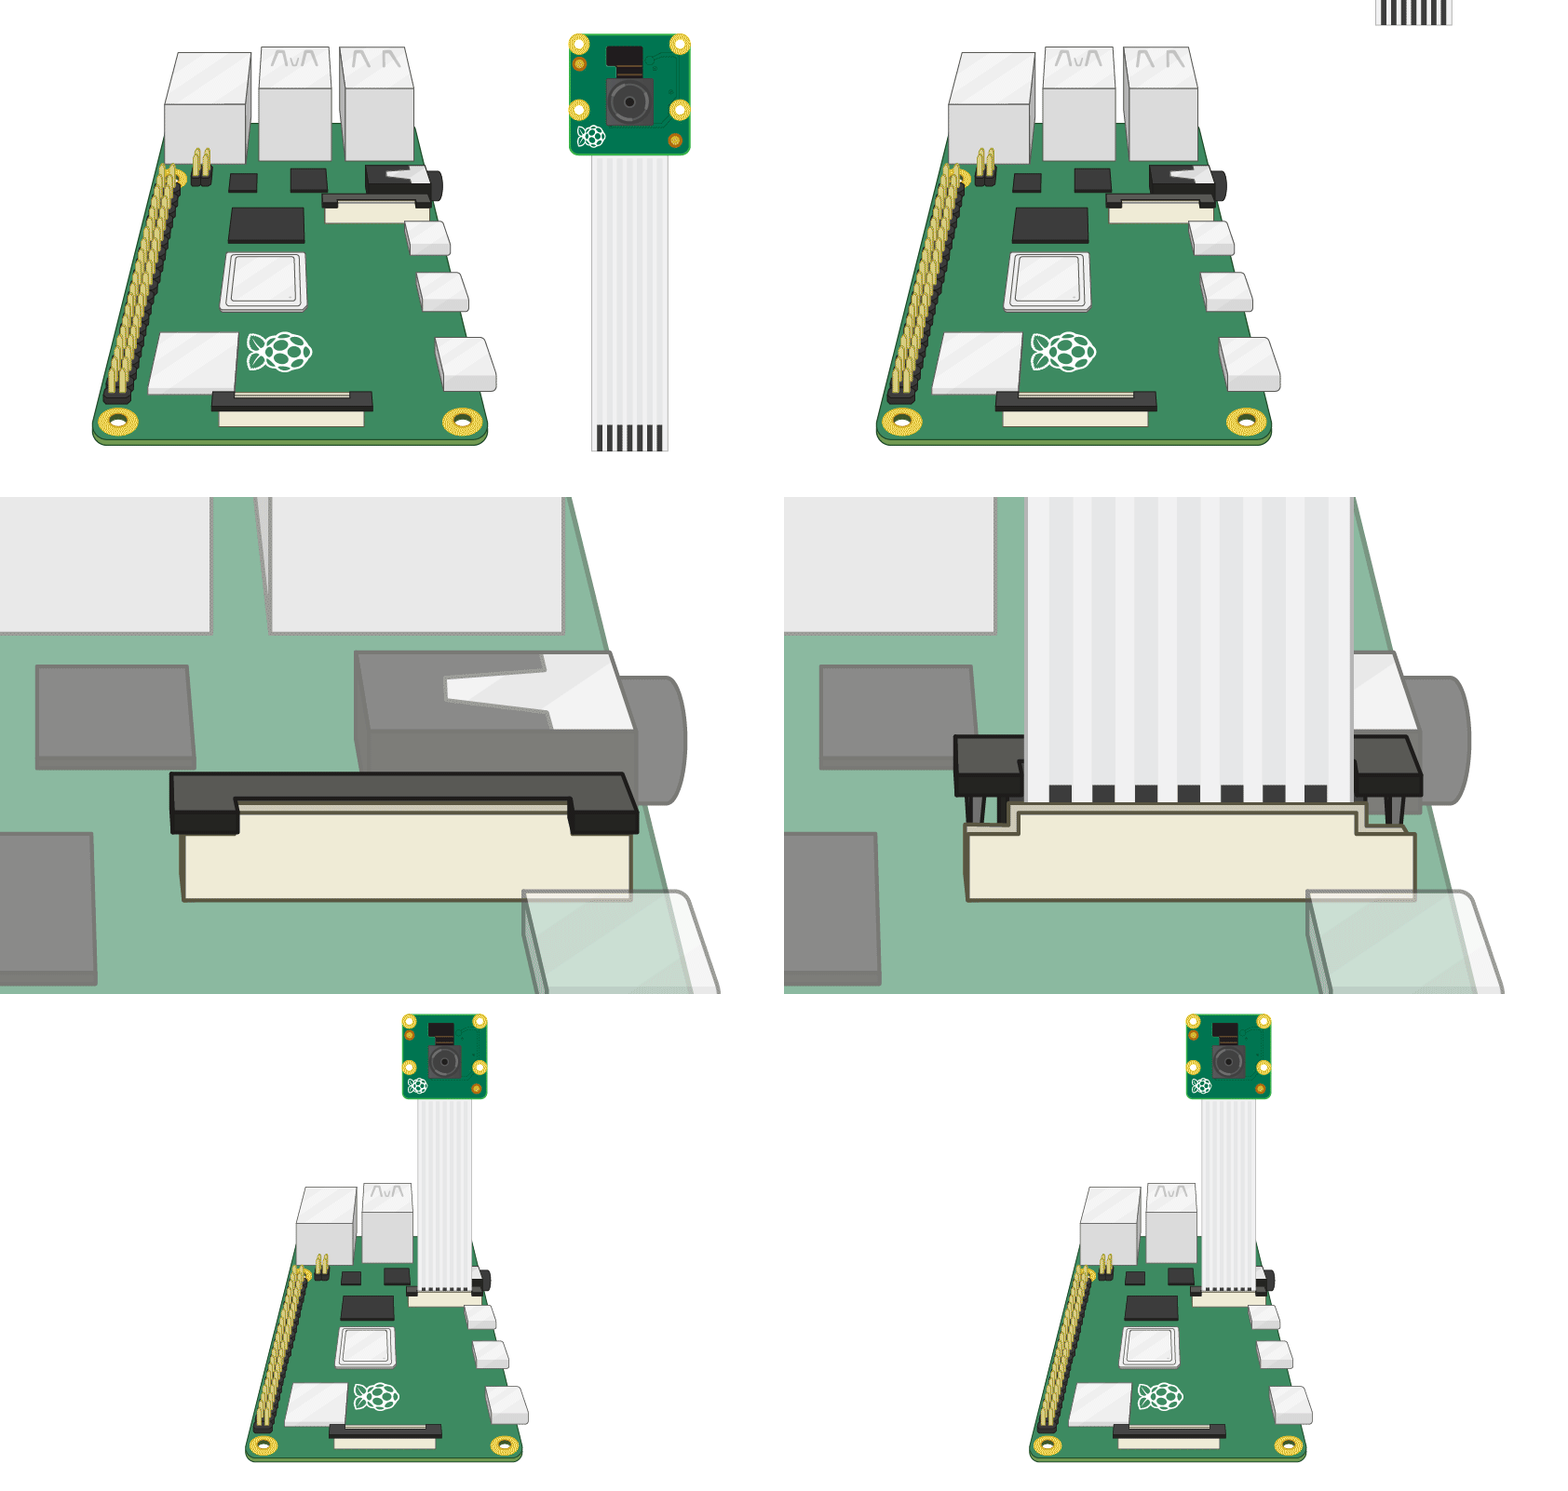
Our camera is a Raspberry Pi Camera Module V2. Connect the camera to the Raspberry Pi’s camera port as shown below.

Now, we have to enable the use of the camera module in the configuration settings. Connect to the Raspberry Pi over ssh, start the VNC server, and open up your VNC viewer. Open the applications menu in the toolbar and go to Preferences -> Raspberry Pi Configuration. Under the Interfaces tab, enable Camera. You’ll have to reboot the Raspberry Pi after this and then reconnect over SSH and VNC.
You can take a picture from the terminal to test the configuration using this command (replace image with whatever name you want):
raspistill -o Desktop/image.jpg
Install OpenCV
Install OpenCV using the following command:
sudo apt install python3-opencv
Here’s a python script that you can use to test your installation. Remember to run it using python3 instead of python.